The Sweet
M om just came back from a business trip to Italy, thought it’d be fun to make some sort of Italianish-French, or at least European, treat as a welcome home gift! And she loves almonds. My first thoughts were Macarons, but since, as with most of my inspirations for what and when to do these recipes has been lately, it was rather last-minute, I couldn’t quite prepare the proper ingredients and recipe in time. That said, my plan for doing a ‘double post’ a-la my Duck yielded to a surprising and craving revelation; see, I was going to stuff the macaron with the French Almond Nougat, which I had thought was that marzipan-y almond paste snack you see all over each country. To my surprise did I find out it was actual nougat, which until now I hadn’t realized is what one of my favorite Christmas-time recipes for Divinity basically was. It would NOT have made a good delicate macaron filling, but damn is it good, has almonds, and is a candy seen in one form or another throughout Europe, especially the Mediterranean.
Nougat on its own has a few interesting points in its history that stood out; did you know that the confection itself, basically the original mixture of heavily whipped egg whites with cooked sugar, started in the Middle East? Which I can sort of see, I can imagine some of the finer cultures, known for many of their sugar/honey sweets mixed with nuts and sesame, mixing big pots of cooked sweet stuff with the nut of choice to be served for royalty. What’s rather cool, in my opinion, was the candy, and as such interest and technique, spread with the Phoenicians, known as tradesmen who traveled all through the Mediterranean. These were the same people who originally spread wine and grape vines to Europe, and now apparently candies.
Then there’s the name; originally, this kind of treat was named ‘Halau,’ a derivative of their word for ‘sweet,’ and further proof it was probably one of, if not THE, first candy techniques ever developed; at least in the Middle East. Nougat came from the Latin term ‘Nux,’ which meant Walnut, a popular and mostly used ingredient at the time. It was only in the 1700’s when a certain agronomist planted Almond trees in France, apparently FOR nougat, that the Nougat de Montelimar was born.
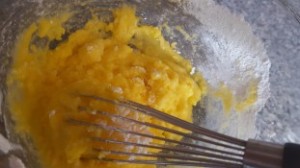
The candy itself is made very much like Marshmallows, but without the Gelatin. Egg whites are beaten until stiff, have a lot of super-hot sugar added in, and continued to whip until it cools down and starts to get hard, in which one adds in nuts and transfers to a pan to set up, to which it gets hard and can be cut in big slices, bite-sized squares, or whatever. Montelimar style, as compared to Italian Torrone or US Divinity, is distinctive in using Honey as a major sugar and flavor source, and sometimes incorporates Pistachios.
Chef’s Overdramatic Self-Centered Lecture Corner
Now, there are two main styles of ‘nougat’ here; there’s a softer, chewier version, sometimes first, but easily breakable that’s often simply termed nougat or nougat de montelimar. And then there’s ‘Nougatine,’ a much harder, cracking version that’s made with caramelized sugar; before I heard the name distinction, I was much debating if I should make it classically hard or soft, but since the latter isn’t pure ‘nougat,’ as I like to seek, it can be held off for another personal fun time.
 Another intriguing requirement for this particular candy, in order to fit the regional designations that allow business to certify it as ‘de Montelimar’ Nougat, is Ratios. Not only does it have to use those certain ingredients mentioned, they have to be put in to a certain amount so as to characteristically fit the required bill. If I remember correctly, Honey had to compose 25% of the candy, and 30% had to be the nuts; either 28% Almonds and 2% Pistachio, or all of it Almond, but nothing else. I can’t say the recipe that I chose to base my own off of got these exactly right, though it seemed very close; besides, not many others were that close either, and some of the ones that really talked about it would then include all these other practices that just seem blah to me.
For instance, the use of corn syrup or glucose in with the cooked sugar. Hey, I get the use of that for candies nowadays, the stability is awesome, especially for home use. But this should be a TRADITIONAL recipe, a treat indicative to something made for at least a couple centuries on bright spring days after the honey. This was kept simple, made in an old pot with just a giant mound of sugar, cooked carefully in the way it should have been. So a recipe that only used sugar next to the honey was the way to go.
 I did make some adjustments however; firstly, the recipe itself called for just cooking the sugar on its own, dry… which is possible to melt properly in a pan without immediately caramelizing brown, but oh so damn difficult. Better to just add some water and let it dissolve first; we need this clear at the hard ball stage of 285F to get the perfect texture, otherwise it’ll just get too damn tough. That and of course mess with the flavor.
Secondarily, this popular recipe had us start out cooking the honey and sugar separately, as all good recipes do, but then added the hot honey into the sugar to cook them both up to the 285F range together. At first, this seems harmless, rather logical; you know you can make a caramel out of pure honey too right? The issue is, when one cooks honey up to that range, it starts to brown and oxidize/caramelize/other-stuff a LOT sooner, and this reaction apparently speeds up when it’s mixed with regular sugar; or only happens when mixed with regular sugar, can’t remember. Either way, if one did this it would end up creating a nougat that’s distinctly darkened in color, not to mention would skew the final flavors. I don’t like that, so I decided to follow the lead of other recipes which, instead, heated the honey itself to 250F, add that into the whipped egg whites alone first, and then the sugar later. Not only to we preserve this amazing honey flavor without changing the color, but it helps to sort of ‘prime’ the egg whites for the much-hotter sugar syrup.
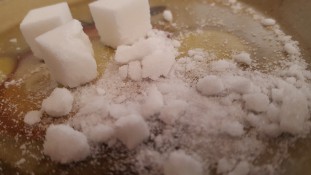
Speaking of sugar some more, this recipe also had the technique where, along with the nuts and vanilla, one dumps in some powdered sugar at the very end to mix in. God I debated whether or not to do this so long, because on the one hand I know that is not a really ‘traditional’ step, it can’t be. That said, making any kind of changes to sugar content can really mess up what I wanted to make. Luckily, I found an excerpt that explained the results of this, basically the sugar would get in and interrupt the long ‘strands’ of sugar to create a candy that broke easier, almost make it ‘softer’ in a certain sense. I actually preferred the idea of a nougat that would bend more, be chewy. Then I realized that of course it shouldn’t really affect it, since the sugar ‘requirement’ for the exact texture result would be all in the cooked; any powdered sugar added last-minute wouldn’t try ‘bolster’ this. So yah, doy me. And end of the day, another step bites the dust.
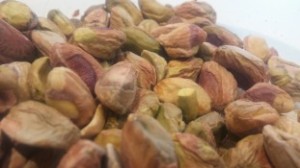
Of course I had to get pistachios in here; we had a large handful in the pantry that had still to be consumed, so it was the perfect recipe to toss them in. No I did not measure, but at the end of the day, unless REALLY trying to following the ratios, which one can figure I also had to not be too hung over for once just to make sure I make a proper nougat, having more or less nuts just determines how much more or less crunchy things one has in their whipped-egg-sugar-treat.
One final note, this one of warning. Candy making IS quite the bitch; recipes are simple, but getting the timing an temperatures right takes a lot of focus and staying in the kitchen the whole time, not to mention knowing what you’re doing the whole time. But if anything, you want the right equipment; do not, and I stress do NOT, attempt something like this, at least on your first time, without a decent stand mixer. Hand mixers don’t cover ground properly, whisking by hand is going to hurt like hell and be all but impossible to keep up the speed needed, and both cases take away the use of one hand for most of it, not good.
Now, I’ll say right now I had some not-so-idealistic results in my final candy, so the recipe that follows has been adjusted to something that should have a much better chance of success.
Nougat de Montélimar
500 grams Almonds
50 grams Pistachios
200 grams Honey
275 grams Sugar
2-3 Tb Water
2 Large Egg Whites
1 tsp Vanilla
Directions
- Pop Almonds and Pistachios in 400F oven for up to 6 minutes, until lightly toasted. Remove, placing back in a warmed oven when close to fabrication

- Prepare desired pan, spraying it evenly with oil before pressing in a lay of Wax paper
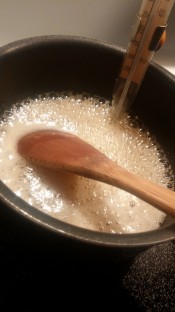
- Place Honey in one saucepot and the Sugar+Water mixture in another with candy or other suitable thermometers, turning heat to medium/medium-high

- Stir often in both until they start to boil; start stirring constantly in honey and remove spoon completely in sugar, brushing the sides of the pan down with cold water if crystals start forming on the sides

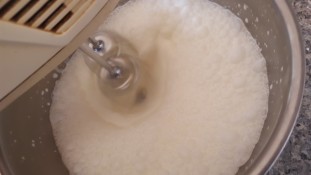
- Place Egg Whites in stand mixer with the whisk attachment and turn on high, looking to beat to stiff peaks right before the first addition

- Once honey has reached 250F, remove and quickly, yet gradually, pour into the egg whites while the machine whips on medium-high. Once half has been added you can start adding in faster

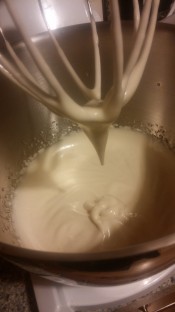
- Whip fast until smooth and seems fully incorporated, and turn mixer down to medium speed to ‘stand by’ for the next addition

- Watching it carefully the whole time, remove sugar once it has reached 285F, immediately transferring over to mixer to pour a slow, steady stream into egg whites, beating them on high once more

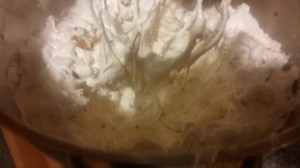
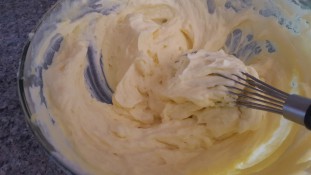
- Once every bit of sugar has been added, continue beating egg whites on high speed for a MINIMUM of 6-8 minutes, likely much longer, until the nougat has almost very noticeably cooled and started to get notably thick in the stand mixer
- Very quickly add in the Vanilla and nuts, mixing in thoroughly; at this point one may need to fold in by spatula or try to quick transfer to the paddle attachment

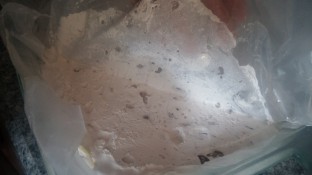
- Using a rubber spatula that has gotten a quick spray of oil, quickly pour and scoop nougat out and into your prepared pan
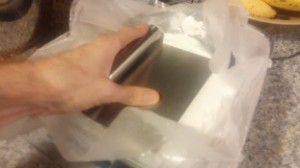
- Cover with wax paper and attempt to smooth the top out with a rolling pin or other handy item
- Let sit at least 3 hours or overnight
- Once set, remove onto cutting board and cut into desired sized chunks
- Wrap in wax paper or melted chocolate for longer-term storage, or just shove into your mouth and enjoy

My Thoughts
Okay, the flavor is awesome, and I heavily worry about my daily calorie intake as I work my hardest not to keep eating these nutty-sweet sugar bombs. I absolutely love that you can actually taste the honey, that little undercurrent of distinctively floral-sweet flavor we know and love beneath full-roasted almonds. Sort of makes me want to experiment with getting a really good honey, those ones that taste like different things like molasses or lilac or marshmallow, and seeing what I can create with it.
I did make a boo-boo though. And know, I’m not just talking about the fact that I think I over-toasted the almonds; I mean, not burnt, they were AWESOME, right before that edge of too-dark, me and my mom love them. But I’m sure this recipe wants them still white in the middle, just lightly toasted for some aroma. To be fair, I did turn the oven off at the right time, it just didn’t cool down as fast as I expected… should have taken the nuts out for some time between.
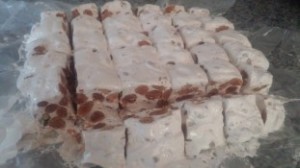
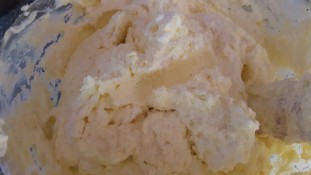
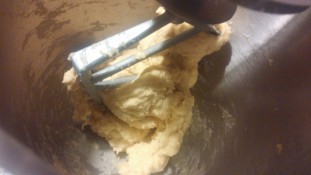
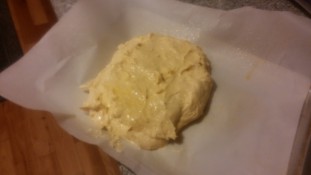
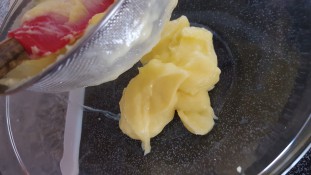
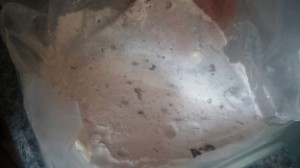 No, my nougat ended up quite sticky, barely firm at all, as you can see in the pic to the right; I had to set it in the fridge for a few hours just to make sure I got a more decent chance at cutting it smooth. And I know where I screwed up. First was when I added the honey in earlier; I still stand behind the reason for it, but I completely looked over the fact that by doing that, I was taking just over half of the sugar source that was going to get cooked to 285F and then mixing it in at a much cooler, softer stage, thus it didn’t have quite near as much hard sugar to form that firm density later. In retrospect, I should have reduced the honey, at least by a little, and added more regular sugar.
Secondly, and I think the true culprit to costing me what would have at least been a really SOFT, but still handle-able, nougat: I under-beat the bastard. After adding in my sugar (which by the way I’ve realized I really need to begin with MORE sugar that what recipes call for, I always lose some that end up hardening up inside/on-the-lip of the pan or the sides of the bowl before integrating), I only whipped until it was notably cooler but still warm, like 8 minutes. I was afraid that if I kept going until really thick, I might not have been able to mix the nuts in well, plus I know how much of a bitch transfer would have been. And if anything, I figured it’ be BETTER to under-beat; less air bubbles, more thick sugar stuff. But it did not occur to me that, despite how much whipping and beating it had taken so far, that ideal sugar-egg-white structure still needed time to develop to a certain stiffness, probably also to stretch those sugar strands thin so they set up in a more fragile and not-bendy thing. Or something like that.
-Sigh- Oh darn, always hope my attempt for these posts can be perfect, but I’m too damn lazy to make a second batch right afterwards. Maybe on the holidays…
P ossible Pairings
Not sure about you, but I just want something honeyed with this; maybe a really good, sweet glass of mead if I can find it. And my first thought towards regional pairings were fully negative, as many of the famous southern France dessert wines are quite port-like, darker renditions; but there IS the Muscat Beaumes de Venice, either in Rhone or Roussillon I forget, which is always nice and classically sweet, nectar-y, perfect for this!
Or some super-nutty, aromatic liqueur like Frangelico, served ice cold. Come to think of it, we got a bottle of special Pistachio-Liqueur in the basement… maybe it’s time we crack it…

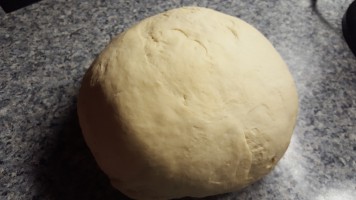
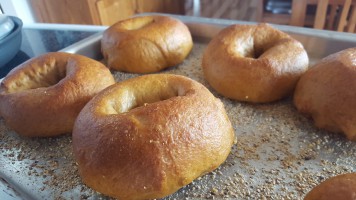
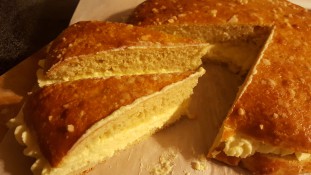
 I’ve been wanting to do a recipe for bagels for quite a while, we’ve been stocking them more often in the pantry again, always a favorite breakfast snack! But there have been two distinct notes of opposition preventing me from doing this: first, of course, find a couple day period to spend making them, a pain when one keeps getting distractions or days that make you just not want to do anything. But the second, and bigger issue, is my recipe book’s requirement for “High Gluten Flour.” And no, this doesn’t mean just bread flour, high-gluten is a step higher than that and apparently instrumental to making those perfectly chewy bagels.
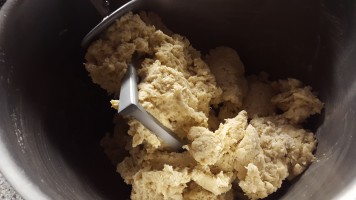
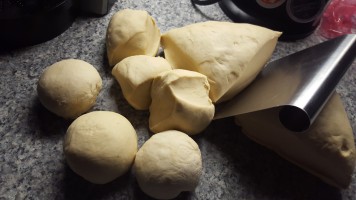
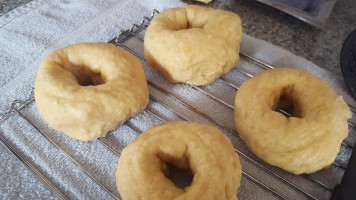
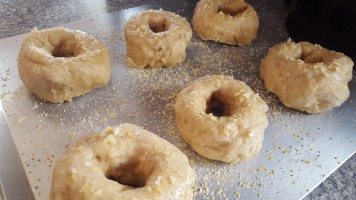
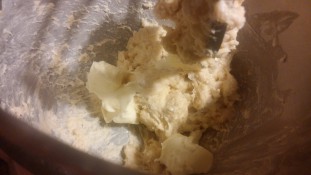
 A few notes, this IS one of the bread recipes where, much like pretzels, the proofed dough is dunked into a boiling water solution mixed with baking soda to gelatinize the outer layer for an even thicker and distinct crust after baking. The dough itself is made VERY firm and stiff; it is highly advised you do NOT try to man up to knead it and just use a stand mixer instead. Because even THOSE will be struggling to whip it around. And I mentioned the special ingredient of high gluten flour, but there’s another one: Malt Powder or syrup. Apparently they’re used as the sweet aspect in lots of bagel recipes, both for the yeast to eat and to add an additional edge of flavor to the final product [likely a continued nod to the older times where some bagel makers just used some cheap available leftover materials from their or other beer making]. The powder itself is sort of in the same category as the flour, likely needing to order it, but one can find Barley Malt Syrup rather easily in stores, which I LOVE using by the way. For anyone who’s made beer and had to start out using the syrups and powders alongside the malt, they know the concentrated almost-molassasey goodness that this offers! Need to find some other cool things to mix it into… oh, and fair warning, this mofo is STICKY as all hell. No matter what it will not just fall off anything naturally, so be warned with pouring!
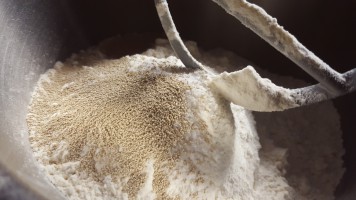 6 cup High Protein/Gluten or Bread Flour
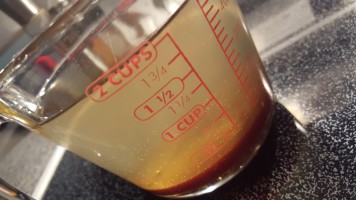


 What Have I Learned This Time?


